Ospelt Flow Manual
Read through the Flow manual for Herbert Ospelt with process and tool insights.
Written By Matthias (Admin)
Last updated Over 1 year ago
Flow In-App Notice: Click here to open in Full-Screen and access more languages:
https://ecosio.featurebase.app/en/help/articles/6792021-ospelt-flow-manual
Welcome to the manual for Ospelt WEBEDI! This manual provides a comprehensive guide to using the solution for order processing and document exchange. If you have any questions or require further assistance, please contact us at edionboarding@ospelt.com.
Registration & Login
The access data must be created beforehand by the ecosio team. This is done after Herbert Ospelt Anstalt sent you the first information about the webedi migration. Login into the WEBEDI is possible via the link https://web.ecosio.com or https://app.ecosio.com. Please make sure that you are using one of these URLs to securely login.
If you should have but have not yet received any invitation via mail from eventnotifications-prod@ecosio.com, you can request it again via https://app.ecosio.com/account/resend-invite with the mail-address which Ospelt sent the information mails to. After logging in successfully, you will see the main functions on the left side of the page: Orders
Password Reset
If you lost your password or have problems with logging in, you can request a new password via https://app.ecosio.com/account/request-password-reset. You will receive a reset link per mail and then are able to reset the password. We recommend the use of a password manager and a secure password.
Process Overview
The WEBEDI solution for Ospelt supports the following processes For orders:
Receiving orders
Receiving order change (optional)
Sending order confirmations
Sending dispatch advices for an order/order change/order confirmation
Sending an invoice for an dispatch advice
Orders
To view your orders, click on the Orders menu item at the top left.
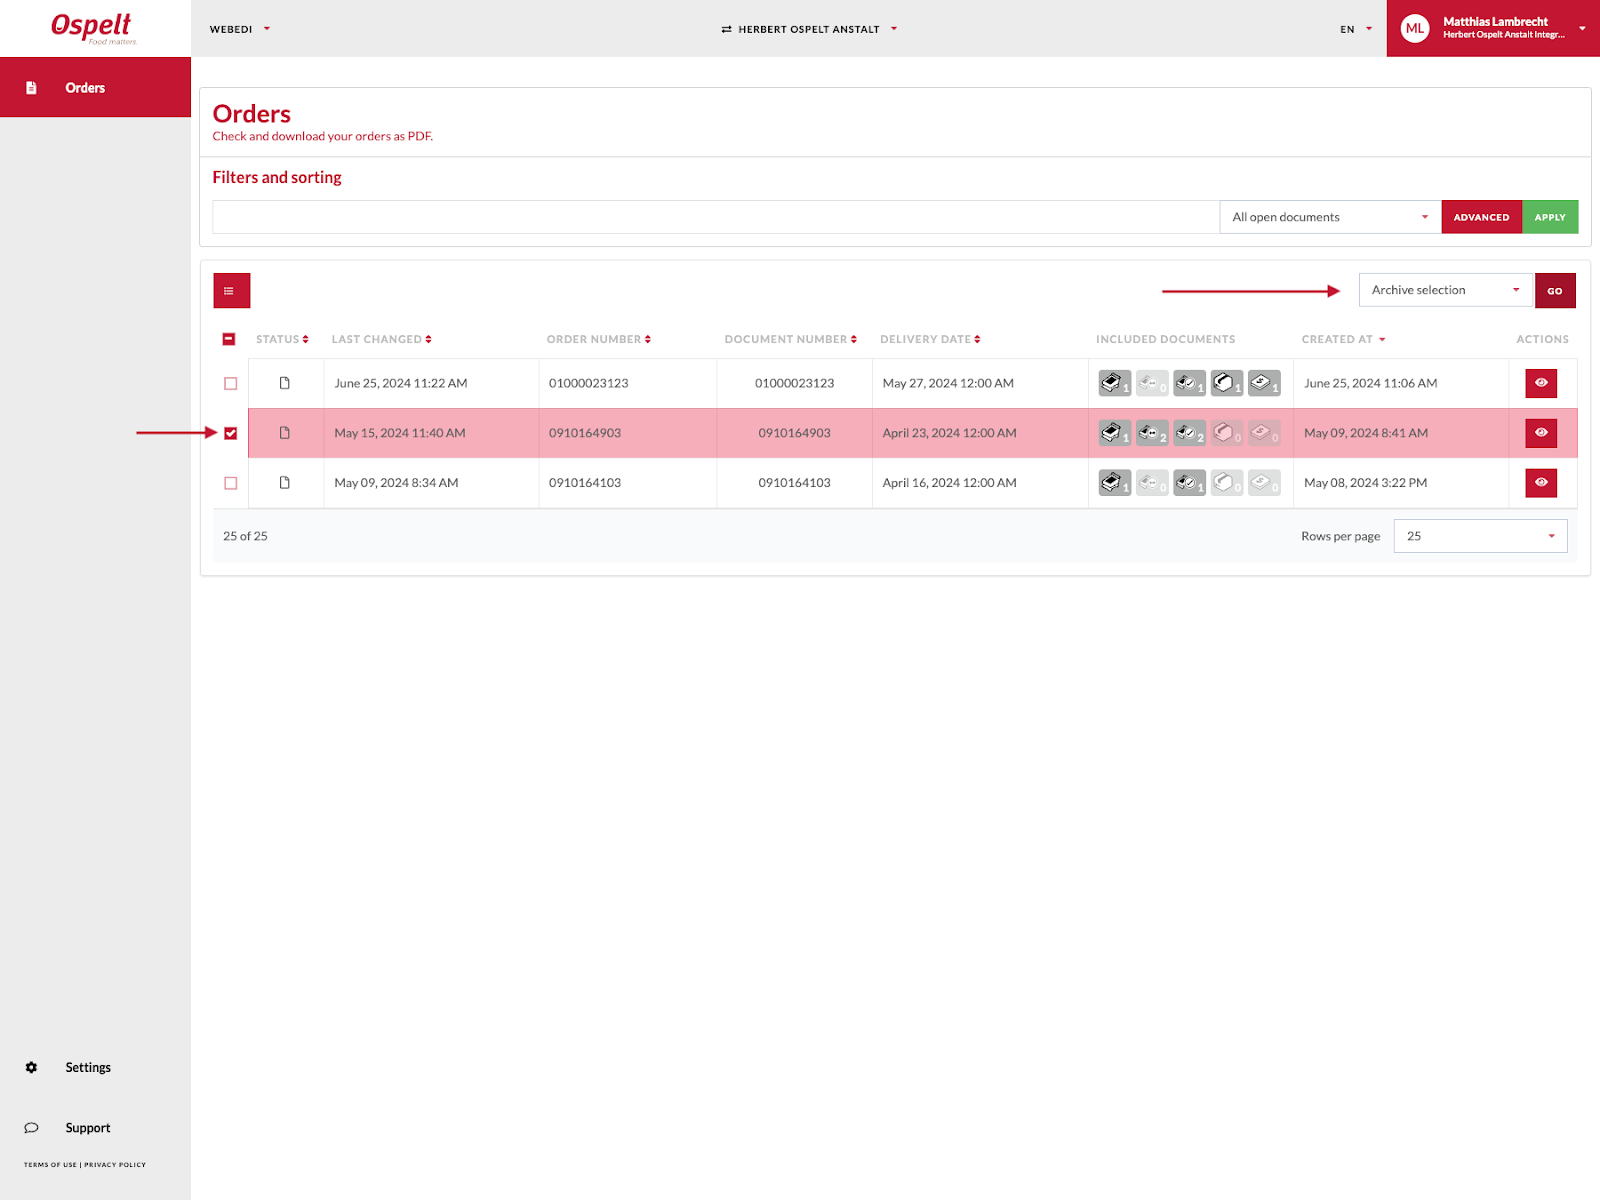
Batch actions (Archiving)
Multiple orders can now be archived within a few clicks. Select the desired orders with the selection icon on the left side of the line. You can also select all orders on the current page (max. 100 orders) with a click on the selection icon in the header in the order. Then click on the desired batch action at the top right above the table. After a successful archiving, a notification is displayed. Please note that batch actions can take some time.
Viewing new orders
Click on the eye symbol on the right side of the row to go to the order process details and follow-up document creation for an order. The detailed view of an order is then displayed. Click on the green download button to download a PDF version of the order. Click on the New order confirmation button to create a confirmation of the respective order. You can create a dispatch advice for the order confirmation by clicking on New dispatch advice. If an order confirmation or dispatch advice is available for the order, then an invoice for this order or delivery can be created by clicking on New invoice. All documents can be viewed in detailed with a click on the respective document at the bottom of the page. There, the documents can also be downloaded as PDFs.

Incoming order changes
Incoming order changes are seamlessly merged with the original orders and any other order changes, ensuring you always have the latest and most accurate version of the order. Our system intelligently handles this process, providing a comprehensive view of the current order status. For ease of tracking the original order and any order changes can be viewed separately. This allows for detailed tracking of the progression of an order and its modifications. To further simplify the process, changes are visually highlighted in a merged view, enabling quick identification of what has been altered from the original order. When it's time to generate an order confirmation, it will be based on the latest version of the order, ensuring that any changes made to the order are accurately reflected.
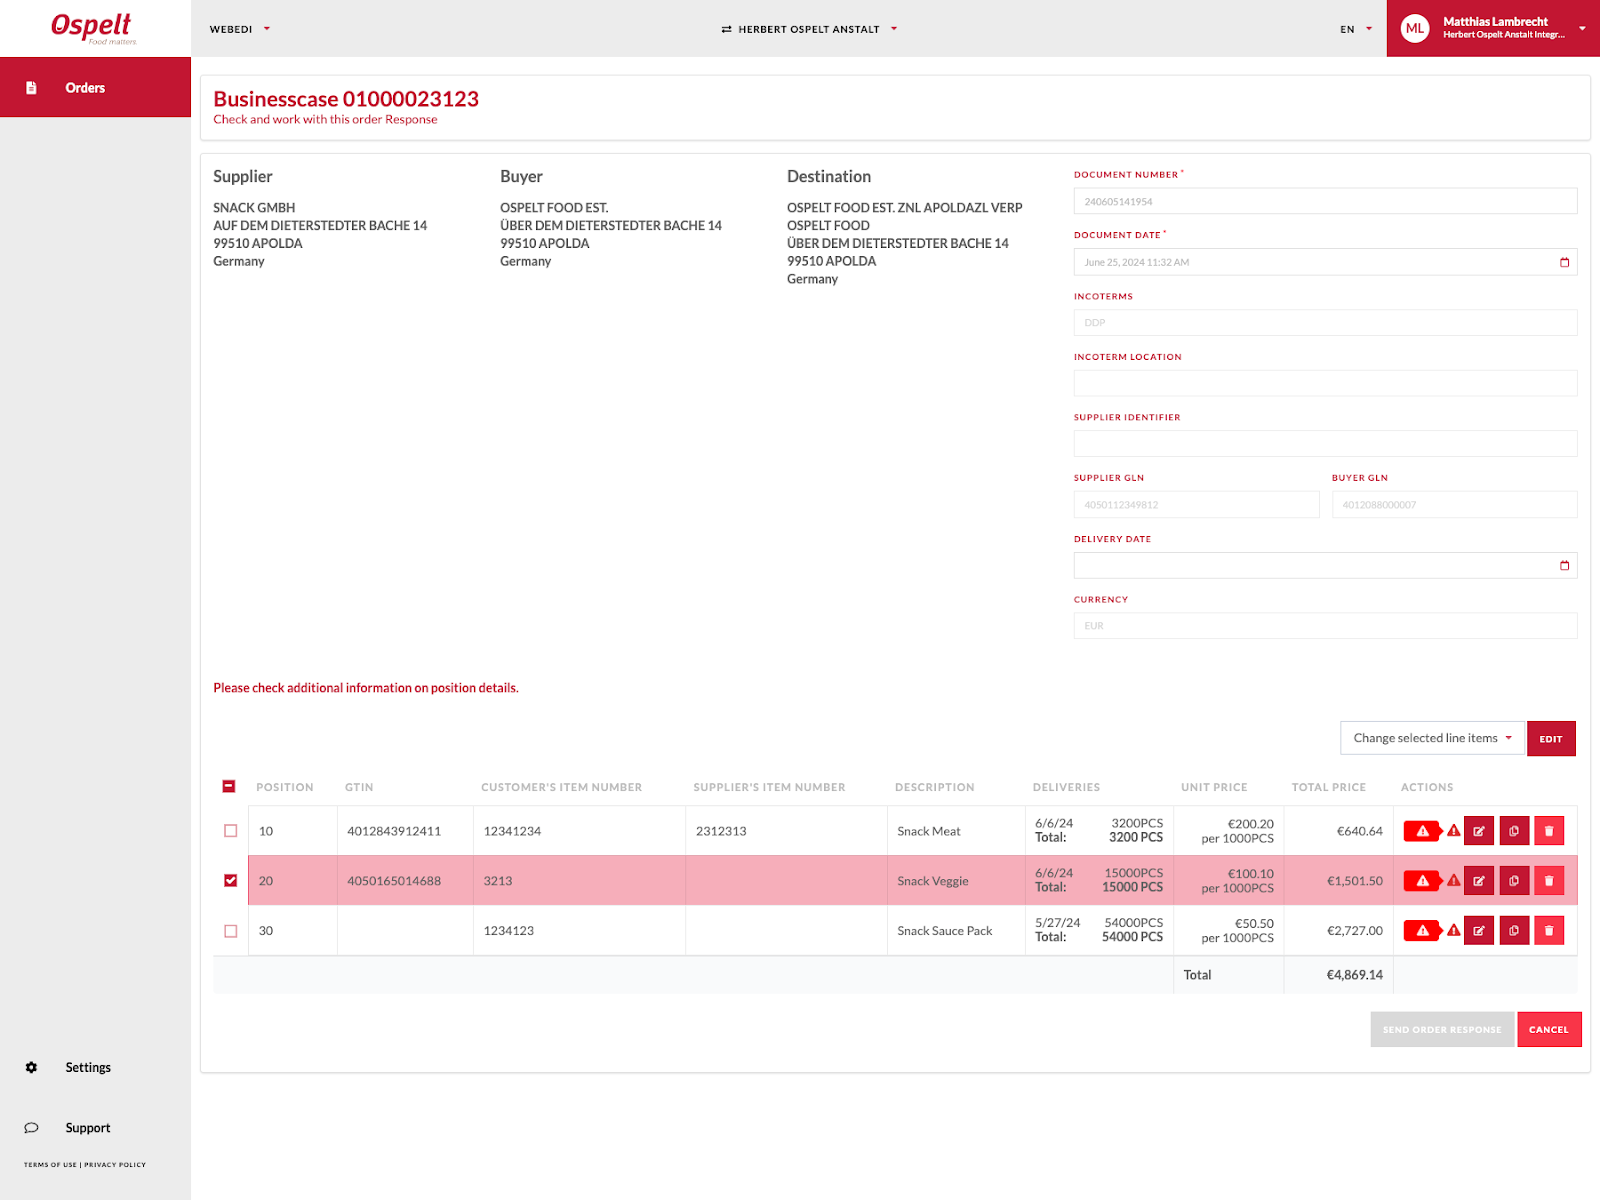
Confirming orders
When confirming an order, the header data can be adapted at the top right and the individual lines received can be corrected with regard to the quantity (e.g. decrease or increase), if less or more than specified in the order is delivered, the price and the delivery date. To confirm a line, click on the edit symbol. The warning symbol in the table indicates the mandatory entries for the relevant position. A new dialog window opens, in which the quantity can be corrected and the confirmation status can be set.
This can also be done in batch for multiple line items with the checkmarks on the left side and the batch action button at the right top of the table.
After all the mandatory fields have been confirmed, you can send the order confirmation by clicking on the green button. The green button remains deactivated as long as all mandatory fields have not been filled.
Note: Please note that changes in the delivery date need to be confirmed with an order confirmation, even if the position was already confirmed. Please be aware that if you remove a position in the ORDRSP, this position is simply not included in the ORDRSP, meaning the position itself is still open. You need to directly contact Ospelt for any cancellations.
Subsequently, you can finish the creation via the send button. Then, you are redirected to the order detail page access the document and create a corresponding dispatch advice.
Sending dispatch notifications
In create mode select the desired delivery date and consignee for your dispatch advice and you will be directed to the edit mask. Please fill in all the mandatory fields in the header before moving on to the item section. You can also change the document number and date.
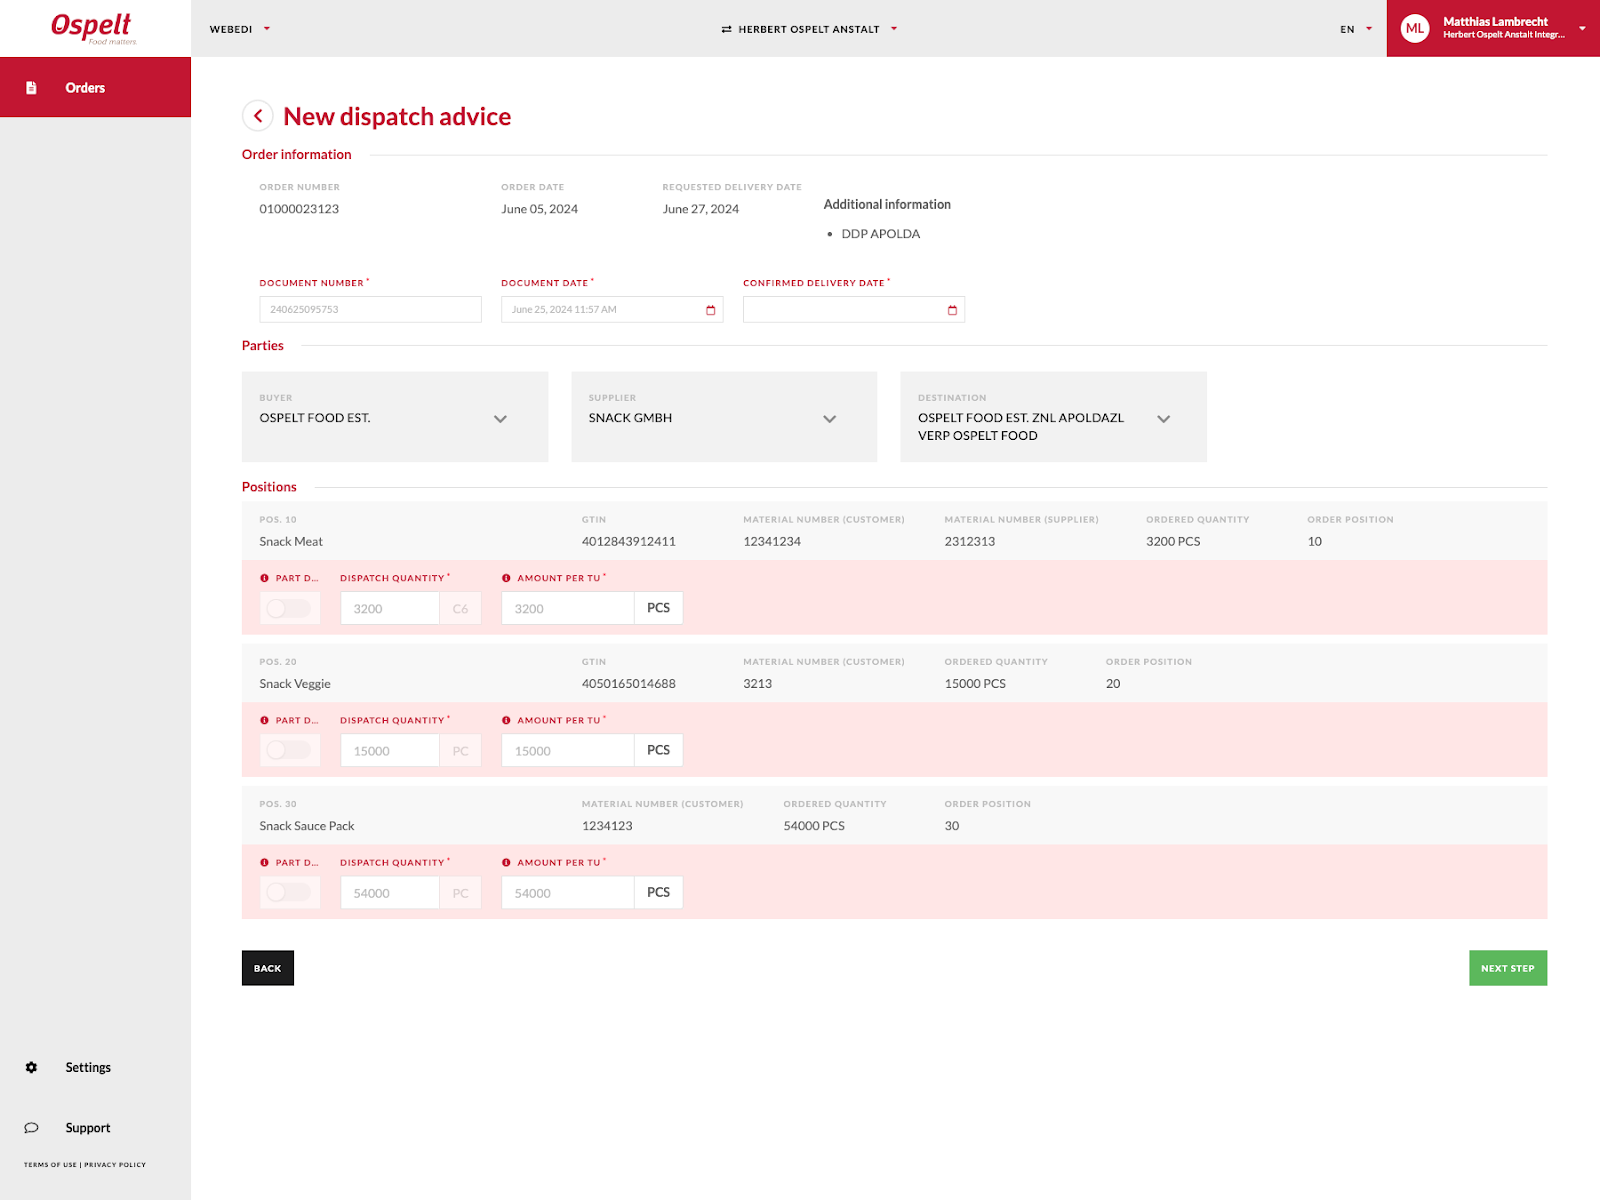
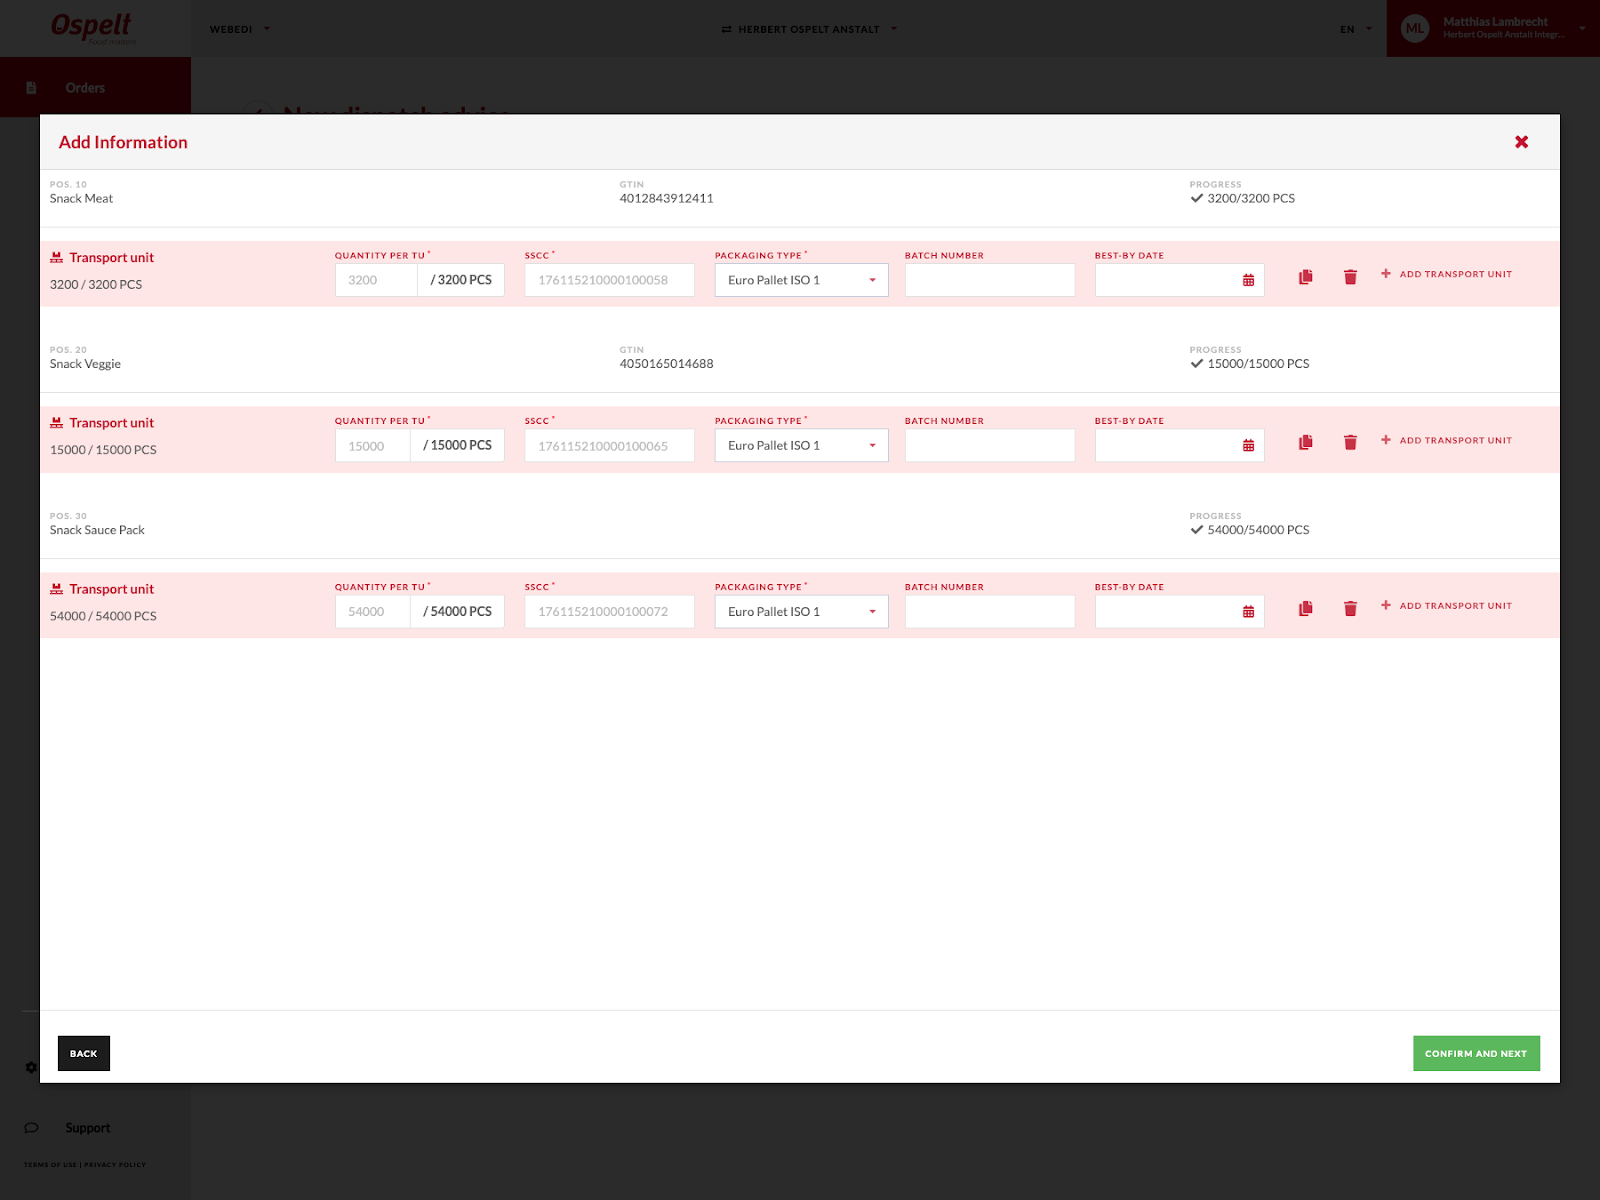
Advanced structure with SSCC
The structure is automatically generated with the input of dispatch quantity and quantity per transport unit (TU) per line item. The dispatch quantity is divided by the amount per transport unit and results in the amount of transport units per line item. This has to be done for each line item. In the next step the complete dispatch advice structure is generated, SSCCs are automatically generated – if the SSCC settings are set https://app.ecosio.com/webedi/settings –, Packaging Types can be selected and further information can be added per transport unit.
After the clicking on confirm and next you will see a non-editable summary of your dispatch advice and then the document can be sent. In the summary mode you always have the option to go back to editing mode. As soon as you click the send document button the document is sent and you will be redirected to the order detail view with a notification at the top where you can download the dispatch advice as a PDF. Also, a link to dispatch advice summary and download is available at the bottom of the page.
Sending invoices
Select the desired dispatch advice for your invoice in Create mode. When creating the invoice, pay particular attention to the header information on the right side. Please fill in all the mandatory fields before moving on to the item section.
Note: Standard values for your address, QR-IBAN and further information can be predefined in the company settings (button at bottom left or top right in the navigation menu). These fields will then be applied directly in the invoice.
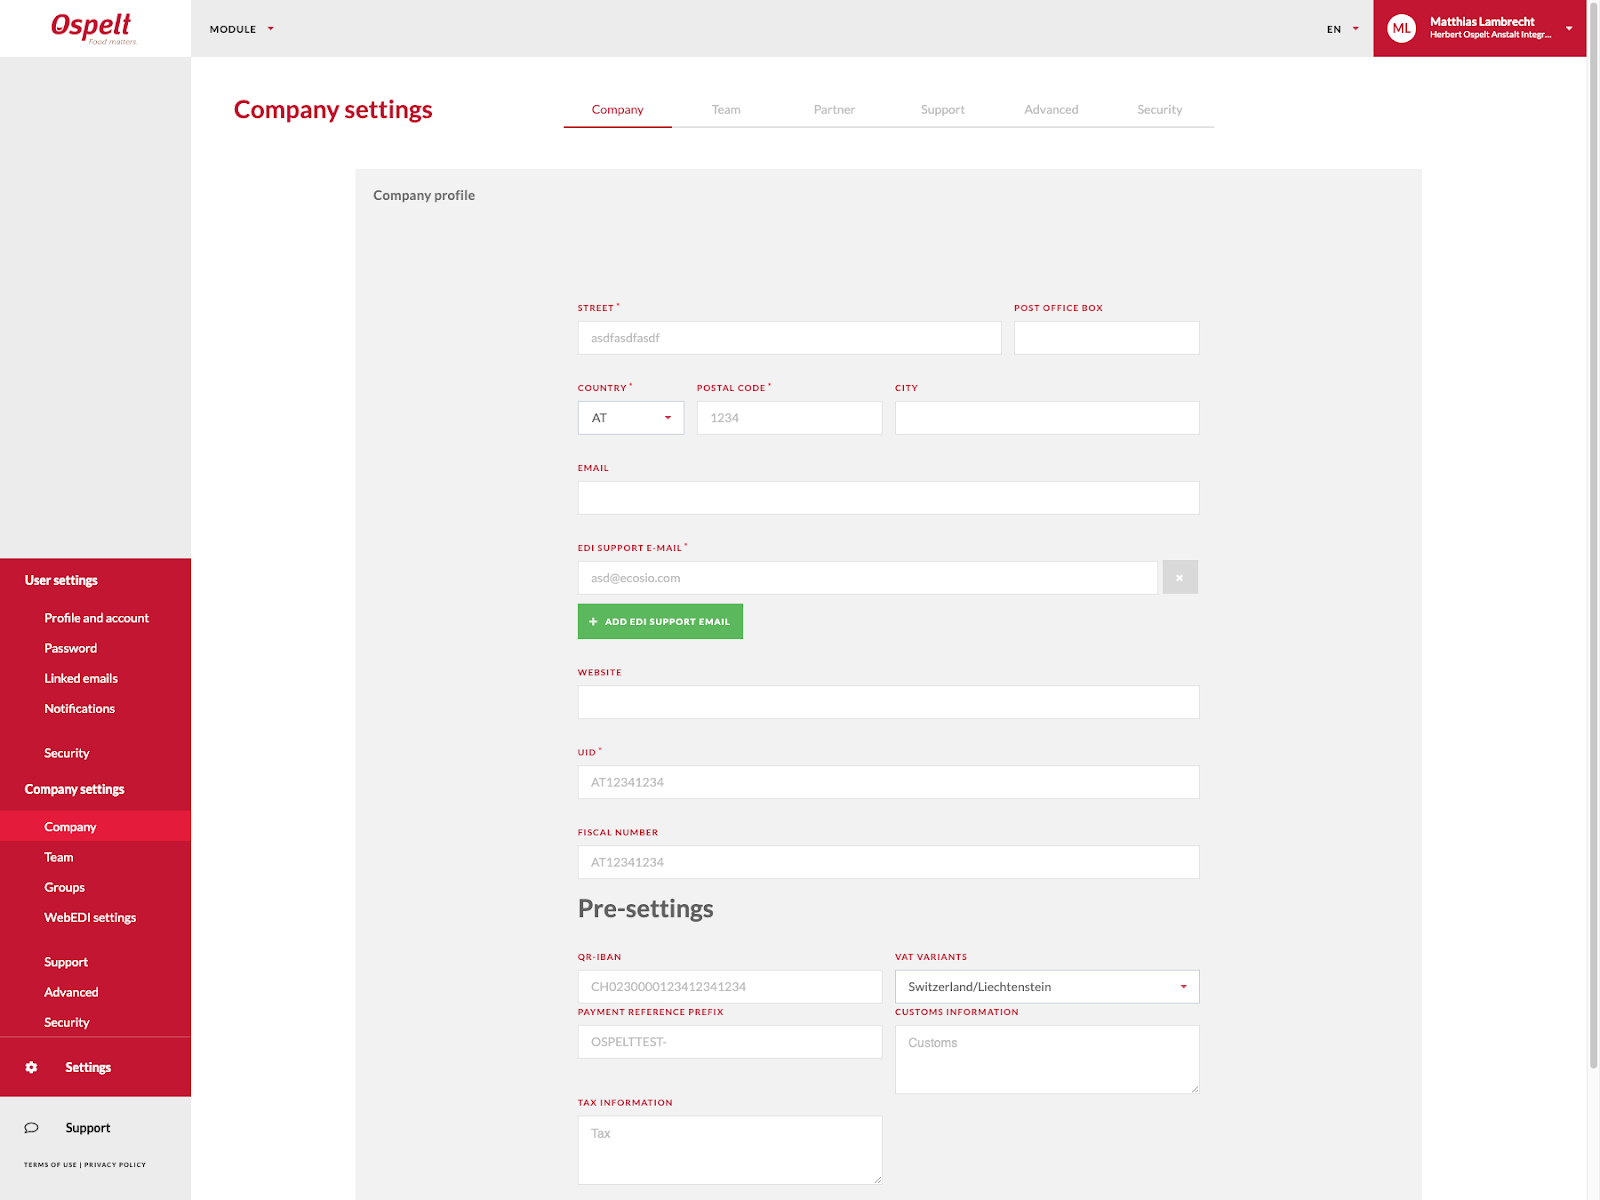
Note ESR- & QR-Invoice: Payment reference and QR-IBAN are special fields which should only contain entries compliant to QR-invoice and ESR-rules. These rules are validated via a check in the webedi since december 2022. Please make sure your QR-IBAN and QR-Reference are compliant to the rules here: https://www.paymentstandards.ch/dam/downloads/qr-iid_qr-iban-en.pdf.
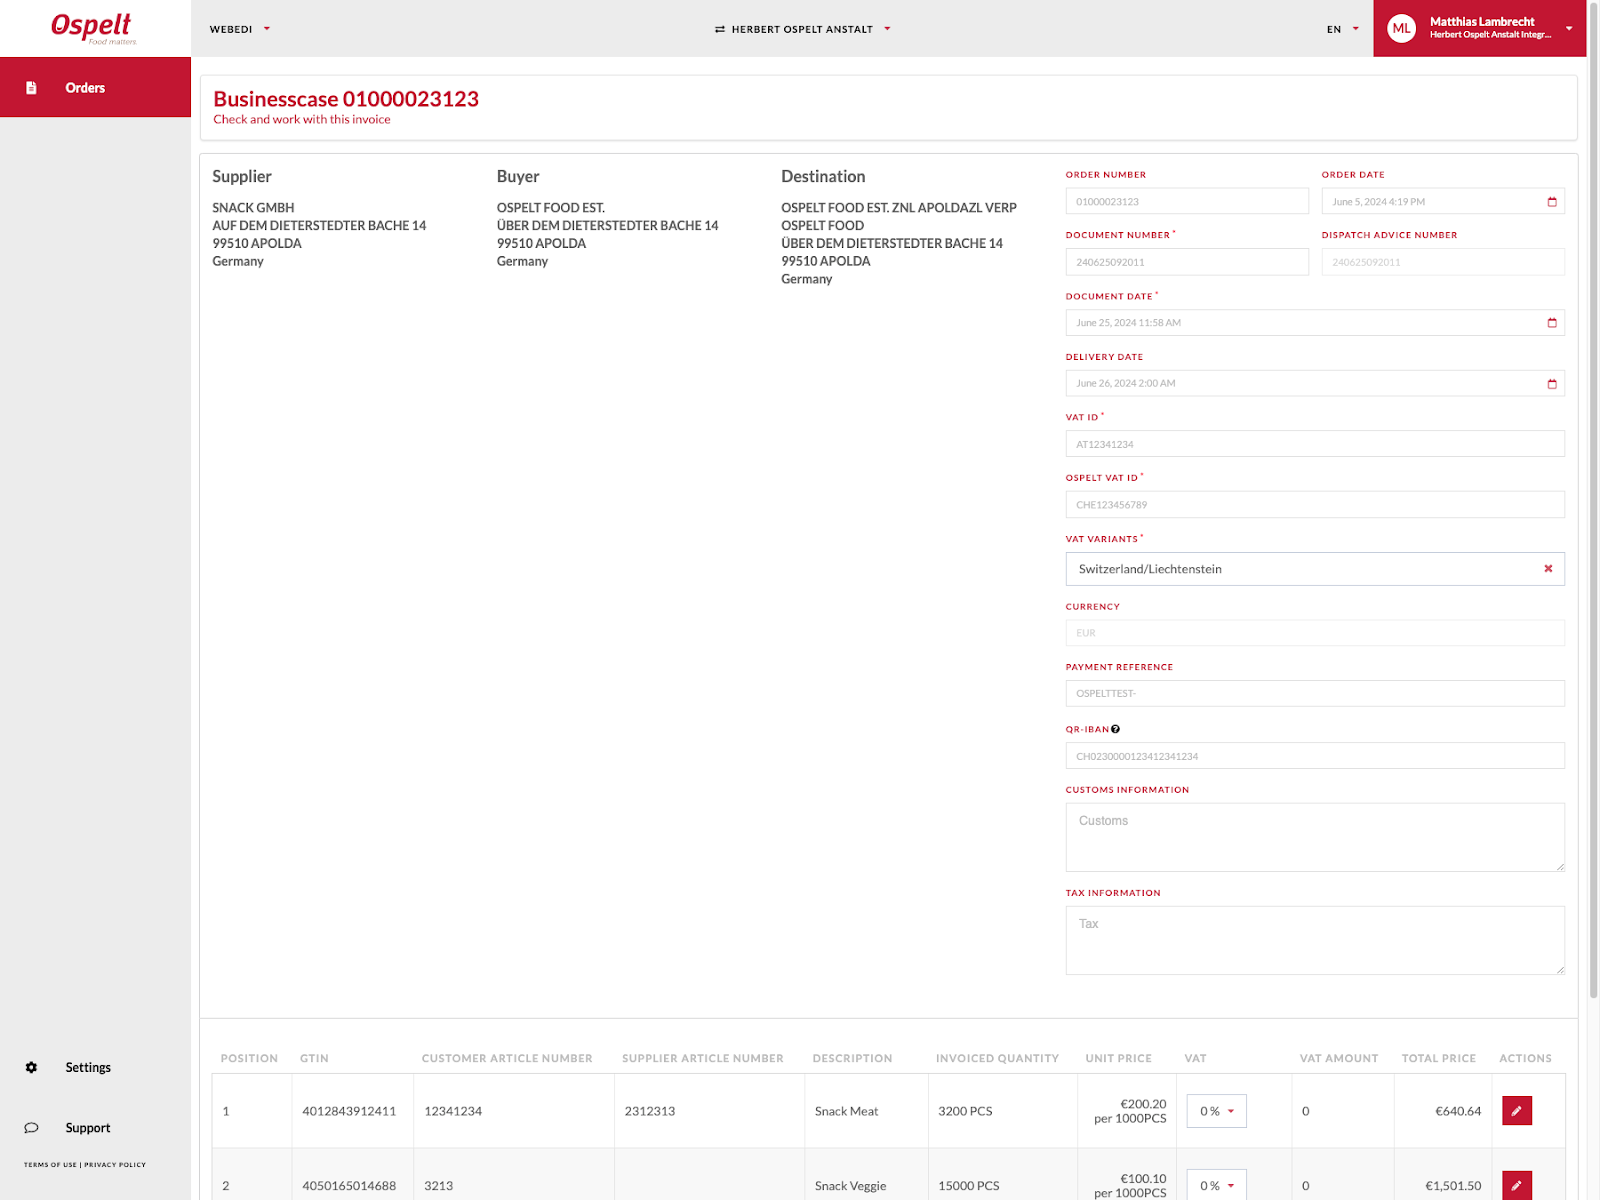
If required, you can then change detail information with the edit button and the VAT rate selected at item level - the country for the VAT rate can be selected on header level and predefined in the company settings. All information on item level is based on previous documents like an orders and a dispatch advice. You can also add any charges with categories and a rounding amount on document level to the invoice amount calculation. After you have filled out all mandatory fields, you can send the invoice by clicking on the green button.
Note: The validation of documents integrated into the Web EDI helps to ensure that you do not forget necessary information required by Ospelt and indicates this with red outlines, * symbols or warning symbols. Please heed these warnings when submitting documents.
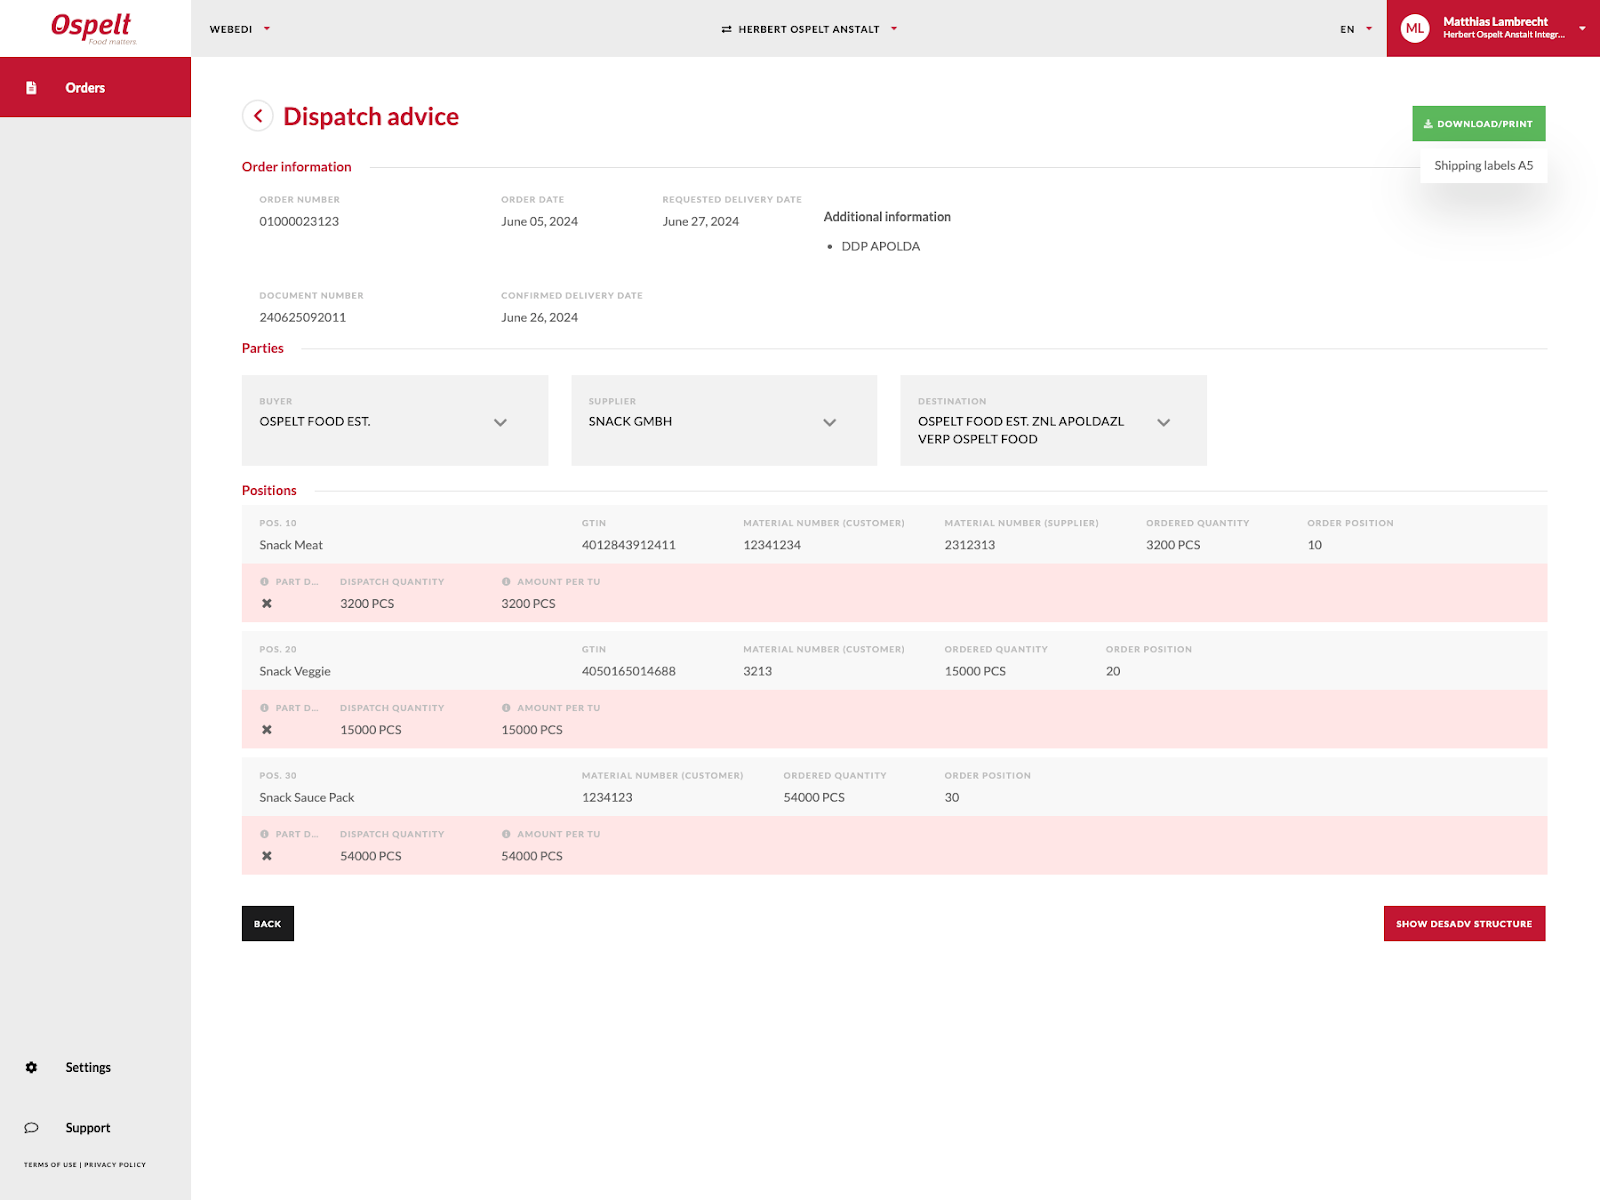
Labels Download
The dispatch advice provides SSCC labels for documents with the advanced dispatch advice structure. Click on the dispatch advice title in the order details view and at the top right you will find a download/print button. Click the wished format and the download starts.
Invite & Remove Users
Note: You need Admin rights for this functionality. Please contact your company admin regarding that matter!
You can invite all your colleagues directly in the settings, if you are an admin user. Either you click the invite button in the navigation menu at the right top or you go to the team settings and invite users via the invite button at the top right of the table.
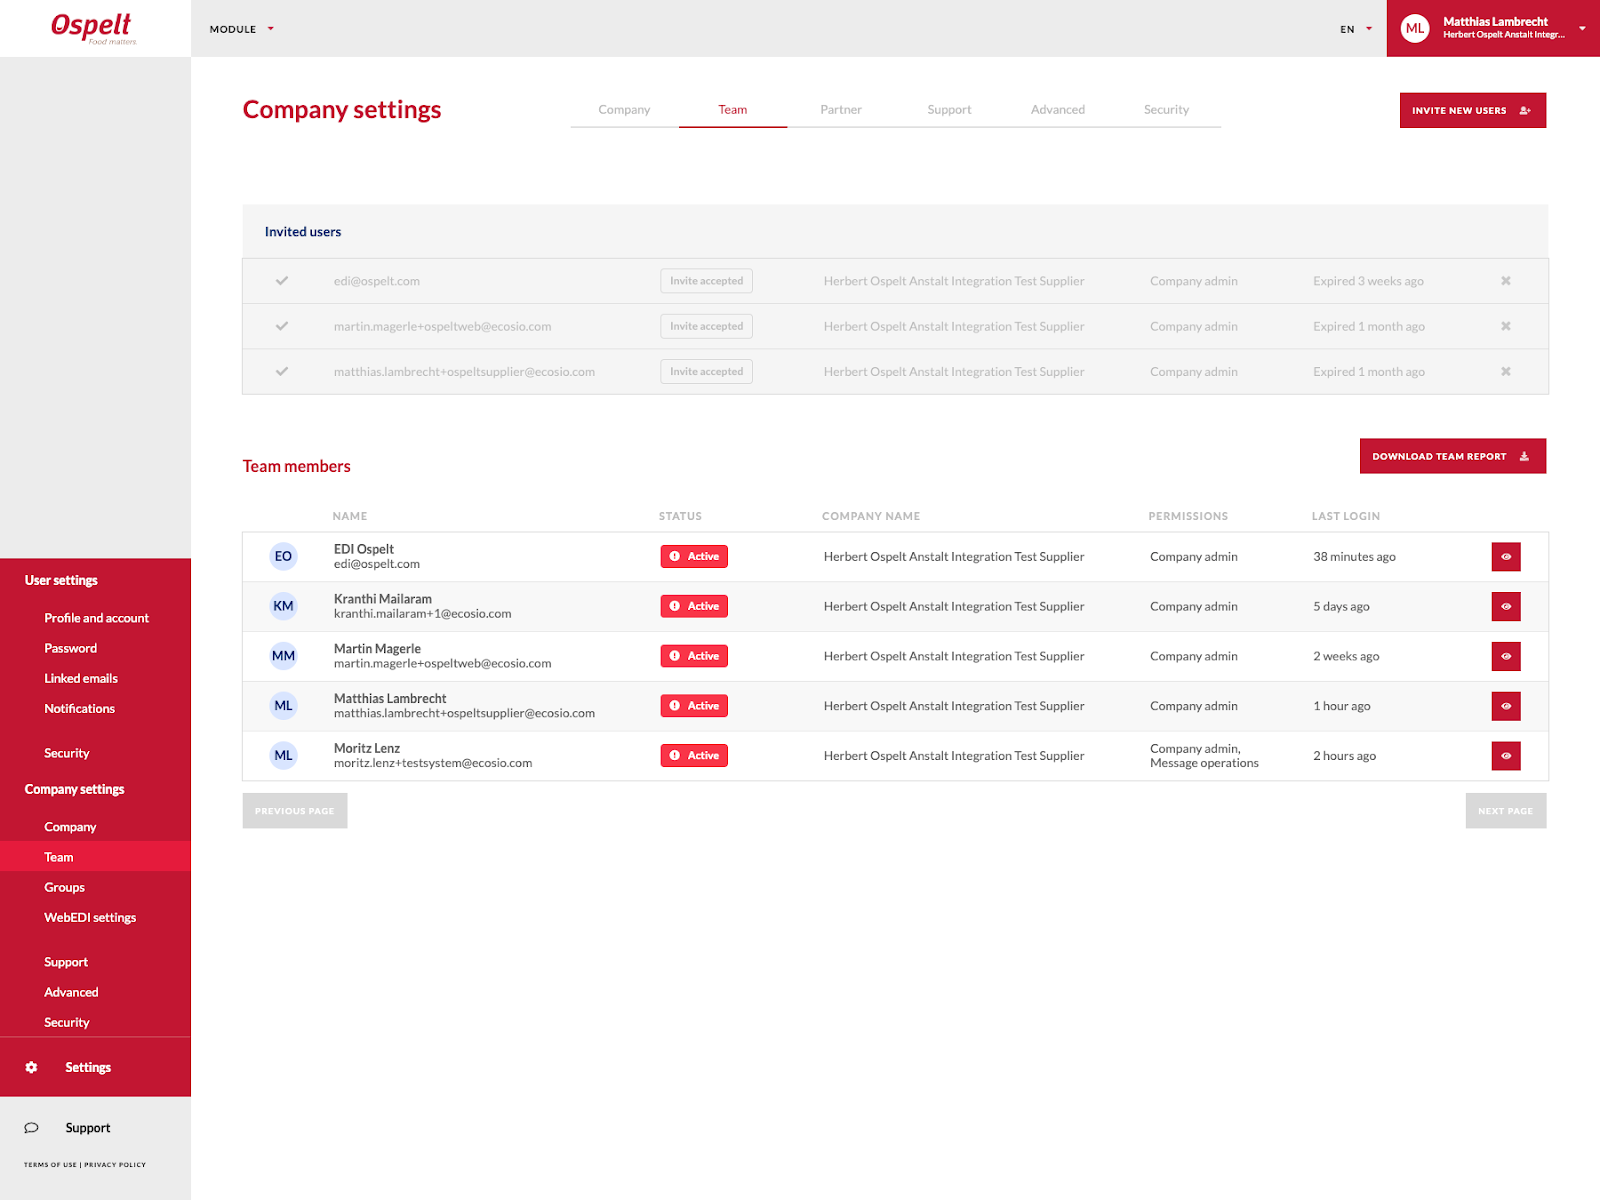
In the Team setting you can also edit users of your team or deactivate them.
Switch
If you are using the WEBEDI with multiple buyers like Ospelt, you can easily switch the company context in the middle of the navigation bar.
Feedback and Questions
If you have any questions regarding the processes, please read the manual or contact Ospelt (edionboarding@ospelt.com). We are very happy to receive feedback about our platform and features. If you have specific wishes or ideas regarding additional features, please add that to the Feedback Portal which can be found in the lower left corner.